Prerequisite
IDE tuning, real pain in the neck?
Although all mordern IDE's come with default theme and a set of plugins you can immediately get started with and these default settings are not bad at all. Yet, this is barely what people prefer. People like their own theme, customized font, font size, spacing, window positioning, key shortcuts and lots more.
As you can imagine, it take months if not years to get the IDE in the shape where you start loving it and start being productive at work.
Ok, you've now got it to a place where its good, it doesn't end there though, you're still making minor tweaks as you go and you now realise that you've done so many changes that you don't remember half of it. Also when you buy a new machine you dread copying all the changes over again. In this article thats exactly what we'll be looking at. Copying all of your changes as and when you make them and sync it to Github Gist.
Package Control
If you are starting with a fresh Sublime text install, you need to install Package control first. To do this simply follow the Package control install instructions.
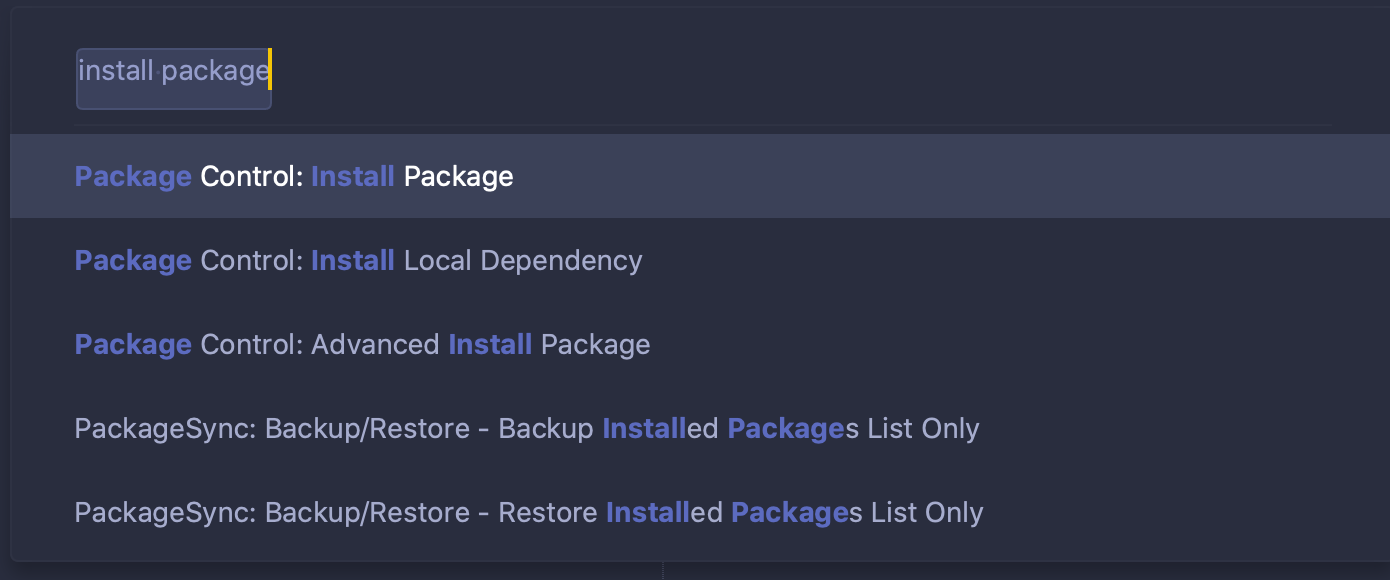
Once you have the package control installed you can open the settings panel by using the shortcut keys `shit + cmd + p` and type "Install package" and press enter. See image below.
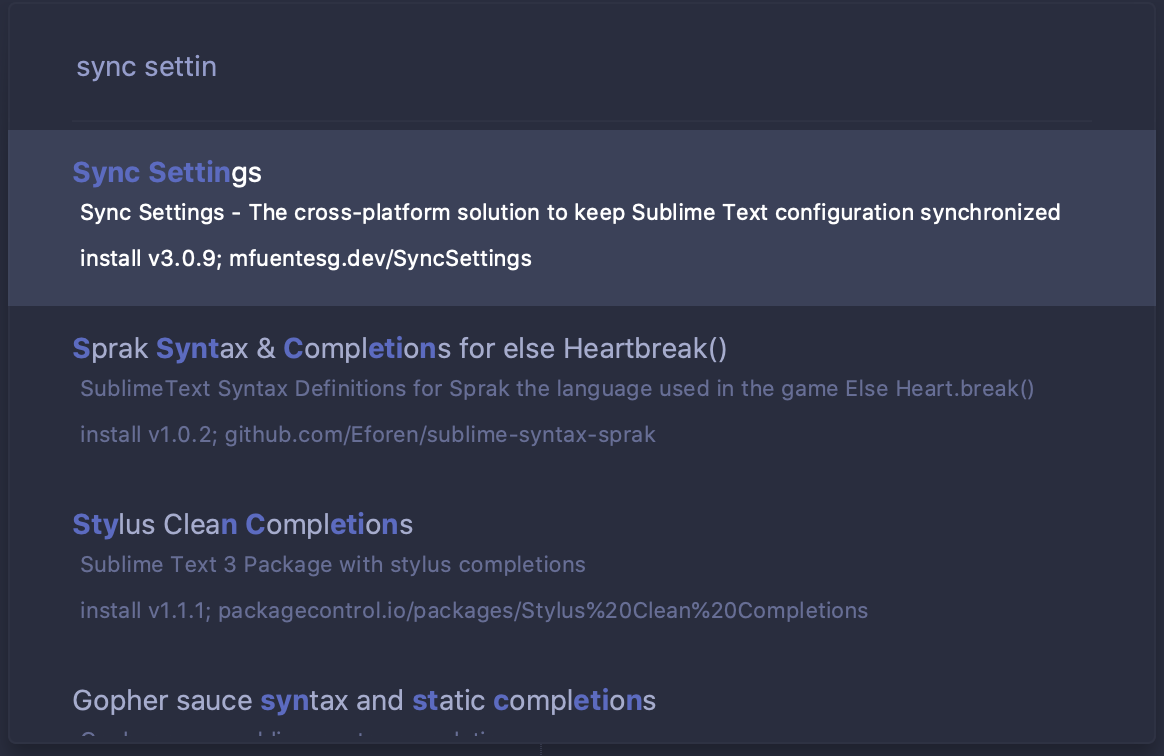
Once you see all the packages available for install listed, type in "sync settings" and pick the one show in the picture below and press enter to install.
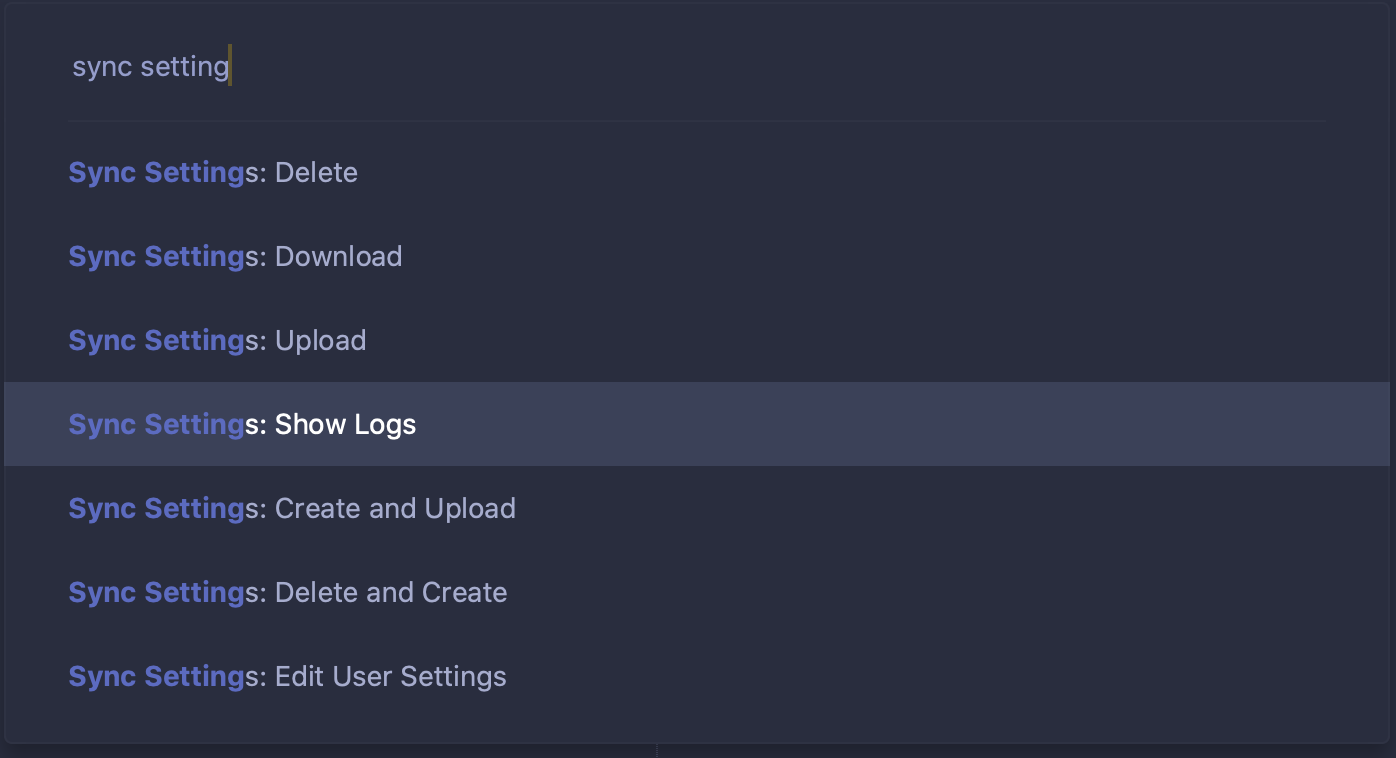
You should now have the plugin installed. You can verify this by opening package control using `shit + cmd + p` and start typing "sync settings", you should see all the available options like so.
Gist token
Now that we have the plugin installed successfully, we need to establish a connection with Gits. To do this we need to create a Github token. This section explains just that. If you already have the token then skip to Already have a Gist token? section.
Creating a new Gist token?
Head over to the Github settings / tokens page and create a new token. Under Select scopes section make sure the "gist" option is checked and give it an approperiate name and create the token.
Get the newly created gist token and add it to your "Sync Settings" package, user settings as shown below.
{
    "access_token" : "paste your token here"
}
Now that everything is set up, open package control `shit + cmd + p` and choose Create and Upload and press Enter to sync all settings.
Already have a Gist token?
If you already have a Gist token, copy it form Github and open up your "Sync Settings" package, user settings file and paste the following in and save it.
{
    "gist_id" : "paste your gist id here"
}
Open package control `shit + cmd + p` and choose Download and press Enter to download all settings.
Thast it! Great way to always keep your theme settings, plugin settings, theme etc. in sync across multiple workstations. Hope you find this article useful. Thanks for reading 👍.